Friday, June 19, 2015
Great Organic Candles
Hey, I found this really awesome Etsy shop at https://www.etsy.com/shop/PhoenixCandlesTx
Sunday, March 1, 2015
DIY Greenhouse
Living in a neighborhood that has a homeowners association,
has challenges in what you can and cannot build on your property. Most
buildings will be approved as long as it is properly designed, up to code and
built by someone who knows what they are doing. But getting your building
approved by the board may take some time. It could be something as simple as a
storage shed or back patio or a greenhouse. In our neighborhood, if the
building cannot be seen from the front of the house or the privacy fence then
nothing can be said about it.
Having a garden, even a suburban garden, is not complete
until you have your own greenhouse. After researching the many types of
greenhouses, what materials to use, and deciding where to place our greenhouse,
I decided to go with a lean-to type greenhouse that will be placed in the front
corner of our privacy fence. I chose a lean-to because the fence will be the
main support for the greenhouse and it will hide the building. A lean-to is
also less expensive to build since we will use the fence as part of the greenhouse,
saving on building materials.
I consider myself a novice builder but I was a gofer (go for
this, go for that) for my Dad for years and years and have learned from him on
how to build things. I was able to build the greenhouse with 2 gofers in about
4 hours. The first thing I recommend is to level the ground and let it settle a
little bit before starting this project. I had one low spot at the corner where
the two sides met and had to add some extra dirt before completing the build. I
built this greenhouse in 5 different sections. I started with the side of the
building as it was the biggest section to complete. I used treated 2x4x8's and
a framing nail gun to secure the boards. If you do not have a framing nail gun
you can use wood screws instead. Be sure to pre-drill the wood before using the
screws as to help with splitting the wood.
This section will be 6 foot tall by 8 feet long. I cut 7 boards 69
inches in length before nailing the boards together. Next I laid out the top
and bottom boards and nailed 2 boards, one on each end, to start my wall. Now
measure on the top and bottom boards starting from the inside of the end board
5 marks of 18.5 inches. Arrange the 5 other boards on the marks, center them,
square them up and nail them in.
Next I made spacer boards to go in-between the vertical
boards as added support. Measure the space in-between 2 boards (start on the
end), cut and nail in. When you nail in
the spacer boards, you will have to stagger them in order to be able to secure
them properly.
The last step with this wall is to nail it in the fence. I
measured out 7.5 feet from the edge of the fence and nailed in the wall on the
fence running boards. Using my level I made sure the wall was level vertically
before I nailed in the wall.

The next complete wall, I built in three sections consisting
of one door and two mini walls. The only reason I did this was so I didn't have
to duck into the greenhouse every time I needed to go in and out of it. Being a
man who is 6'1" being able to walk in and out of things without hitting my
head is a priority for me.

Before
attaching the door, I wanted to roof in the greenhouse. I did this 5 2x4x8’s and 4 clear PVC 26”x8’
roofing panels. Starting with the 2x4’s,
I laid them flat starting with the farthest end and spaced the wood 20 inches
apart from each other. Once the running
boards where attached I took some scrap wood (approximately 12-18 inches) and
secured the 2 mini walls to the last running board so that they both would act
as one wall. The roof running boards I
rested on the top of the fence running board and nailed each board in starting
with the fence side first and then moving down to the side wall. After securing the last roof board in, I laid
the first roof panel and used roofing screws to secure the panel to the wood. The next panel I overlapped the first panel
approximately 2 inches and screw the panel in.
I did this with the other 2 panels until the roof was completed. So the roof wouldn’t sag at the top, I took
some of the scrap ends (12-18 inches) and placed in-between the roof running
boards.


The last section I built for the greenhouse was the
door. I didn’t use 2x4’s as I did for
the walls; I used 2x2’s to reduce the weight and to help with the door from
sagging. The door I made is roughly 73
inches tall by 34 inches wide. I made
the door this wide so the garden cart Melissa’s father made for her this past
Christmas would be able to fit in with ease. The top of the door I made a little shorter on
one side so that it would not rub the roof running board. I cut the top and bottom pieces 34 inches, the
taller side 71 inches and the other 70 inches.
After attaching the 4 pieces together with screws (this part of the
build I didn’t use a nail gun because a framing nail gun would have shattered
the 2x2’s), I made 4 support pieces that would be attached to the 4
corners. I didn’t measure out the
support pieces; I just started by cutting 2 pieces of wood at 18 inches in
length and used a miter saw to cut an angle of 45 degrees on each end. I attached one piece at the top right corner
and the other at the bottom left corner.
For the next corner, I cut a 45 degree angle on one end and placed next
to bottom support piece. Laying the
piece out on the opposite end, I marked where it would rest against the wood
and cut another 45 degree angle. I
attached the piece and did the same with the last corner. After the door frame was complete, I took 2
hinges and attached them on the outside of the taller side wall approximately
1/3 the way up from the bottom and 1/3 the way down from the top. Then I took the door and secured them to the
hinges.

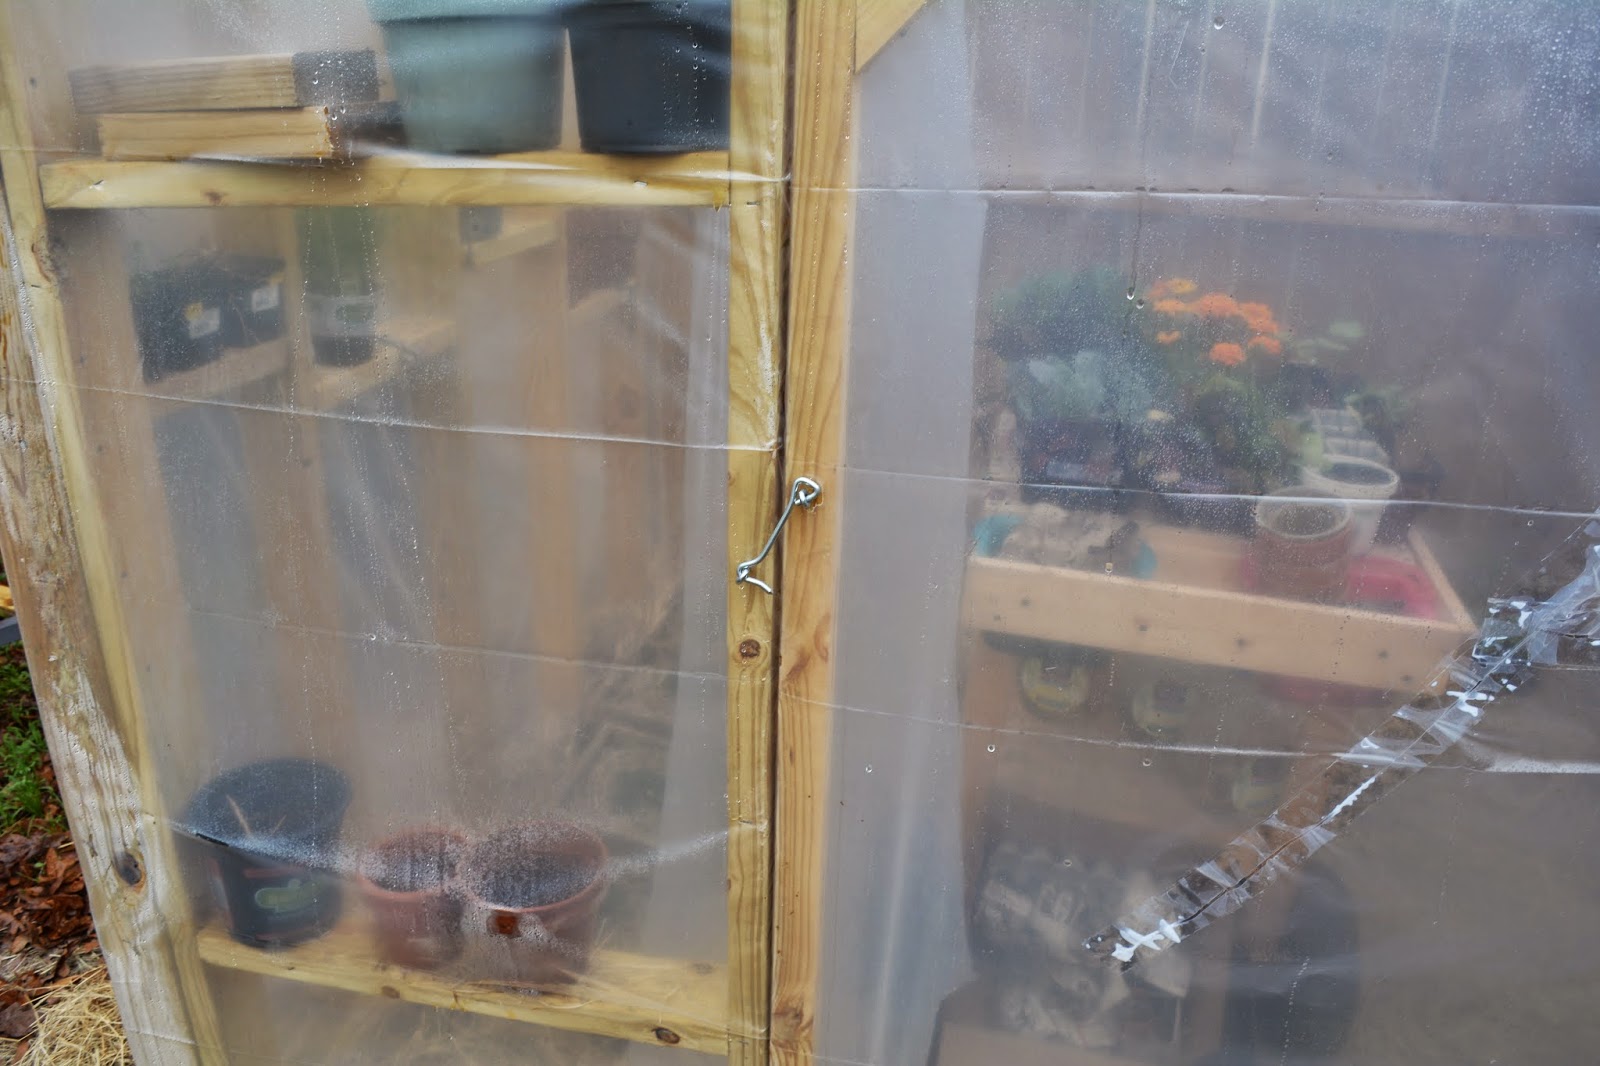
The last thing to complete this greenhouse is to wall it
in. To save on cost I decided to use
clear plastic sheeting, the kind you find in the painting department, instead
of the PVC roofing material. This was
the easiest part of the build, I started out by unrolling the plastic sheeting and
using a stapler, I stapled the sheeting first to the fence and then to the
outside walls of the greenhouse. I
stapled every foot or so, on each and every board wrapping around the smaller
wall and I stopped after I was inside the greenhouse approximately 12
inches. I then did the same thing to the
taller side wall and the door so that it would be only 1 gap in the plastic on
that wall. Since 2 of the walls of our
greenhouse are also part of our fence, I lined the walls on the inside of the
greenhouse just on the fence part. After
everything was wrapped I placed a simple latch on the outside of the door to
keep from opening. I had more plastic
than what was needed to wrap the outside and left about 3-4 inches of plastic
on the bottom. I used hay to cover the
bottom of the plastic and inside of the greenhouse to keep weeds at bay.
This was a great addition to our garden; we went from a
small store bought shelf that only had 4 18x24 inch shelves to a 60 square foot
building that has potential to be able to grow anything we need. I saw this as a good challenge for myself,
testing me and my skills. I have learned
what works well and what doesn’t. Just
because this design works for me it may not work for you. Study and research as much as you can before
starting your own greenhouse.

Subscribe to:
Comments (Atom)